I'm ready to install SQL Server 2008 R2 and SharePoint 2010 in a test environment. I'm trying to decide whether to run SQL Server Reporting Services in SharePoint Integrated mode or native mode. What are the advantages of running Reporting Services in SharePoint Integrated mode? Can you provide an overview of what I need to do to get Reporting Services installed and running in SharePoint Integrated mode?
Solution
The biggest advantage to running Reporting Services in SharePoint Integrated mode is that you can deploy data sources, reports, etc. to SharePoint document libraries instead of the Report Manager web application that Reporting Services creates for you. Since your users are probably familiar with SharePoint this makes sense. In addition your users can take advantage of the new version of Report Builder that came with SQL Server 2008 R2 and deploy their reports to SharePoint document libraries, leveraging SharePoint for security. This is easier for them than using the Report Manager. The users can be much more self-sufficient with SharePoint.
In this tip I will highlight the steps you will want to follow to get Reporting Services installed and integrated with SharePoint. I'll be using SQL Server 2008 R2 and SharePoint 2010 Foundation. SharePoint 2010 Foundation is the new name for what was formerly Windows SharePoint Services. It is the version of SharePoint that is included with your Windows 2008 server license. The steps for SharePoint 2010 Server are essentially the same. In order to get a test environment up and running as quickly as possible, I will install everything on a single server. I'm using Windows Server 2008 R2 64 bit; 64 bit is a requirement for SharePoint 2010.
Installing SQL Server 2008 R2
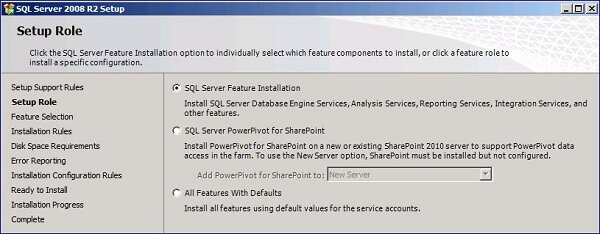
At a minimum, install the database engine and reporting services. By installing SQL Server first you have the option of specifying the database engine that SharePoint will use. Alternatively you can install SharePoint and allow it to install its own instance of SQL Server Express (now called SQL Server Embedded Edition). There are two steps I want to highlight in the SQL Server 2008 R2 installation: Setup Role and Reporting Services Configuration.
In the Setup Role step, choose SQL Server Feature Installation as shown below:

Installing SharePoint 2010
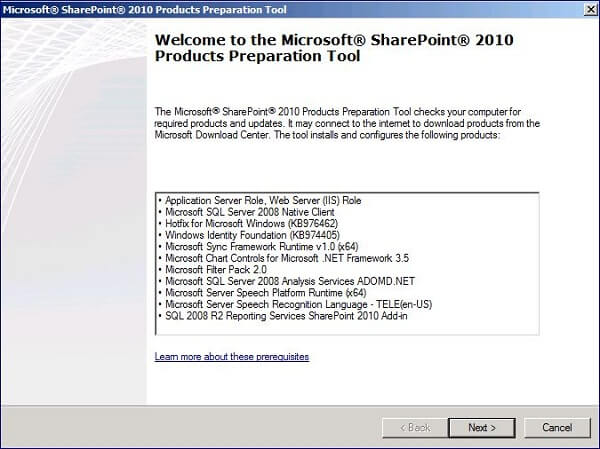
In order to successfully install SharePoint, there are a number of prerequisites that must be installed. When you launch the SharePoint 2010 setup, make sure to first click Install software prerequisites as shown below:

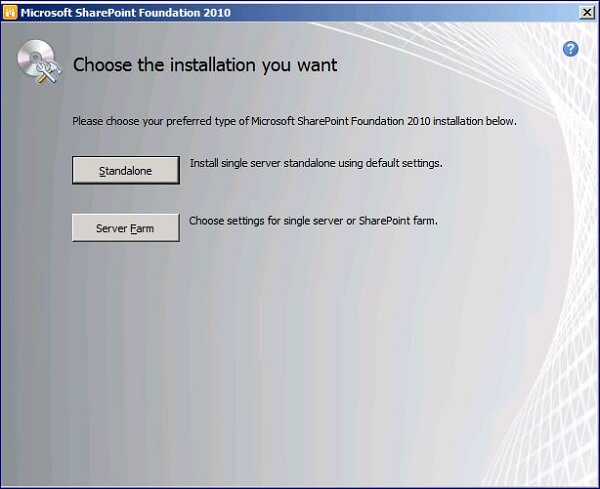
Now we are ready to install SharePoint 2010 Foundation. Click Install SharePoint Foundation on the splash screen (shown at the beginning of this section). Since we are interested in a test environment choose Standalone as shown below:
When the SharePoint 2010 Foundation installation is completed, you will be prompted to run the SharePoint Products Configuration Wizard. You need to do that to in order to complete the configuration steps required to have a working installation of SharePoint 2010 Foundation. When the SharePoint Products Configuration Wizard is finished, your browser will open to the SharePoint Team site that has been created for you.
Configuring Reporting Services SharePoint Integration
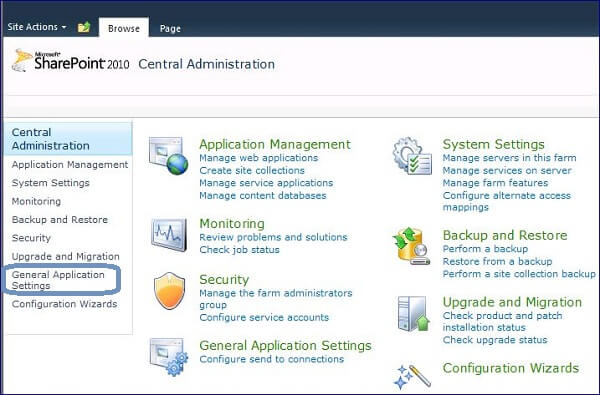
At this point we have Reporting Services 2008 R2 and SharePoint 2010 Foundation installed. The next step is to configure Reporting Services SharePoint integration using SharePoint Central Administration. Launch SharePoint Central Administration from the Start menu (it should be pinned to the Start menu; if not then select it from All Programs, Microsoft SharePoint 2010 Products group). Click General Application Settings as shown below:
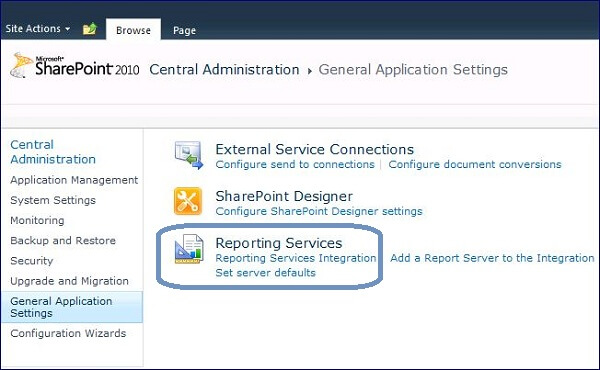
There are just a couple of things that you need to enter to complete the integration as shown below:
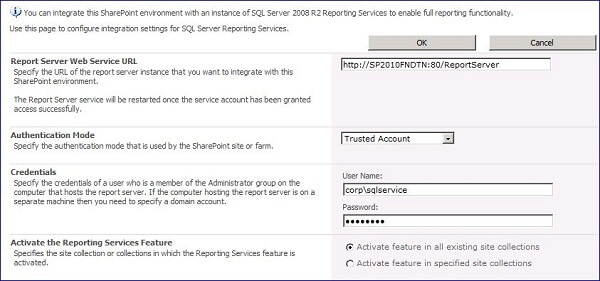
- You can get the Report Server Web Service URL from the Reporting Services Configuration Manager (in the Microsoft SQL Server 2008 R2, Configuration Tools program group). Click on Web Service URL in the menu on the left.
- When you have everything running on a single server as I do in this example, choose Trusted Account for Authentication Mode.
- For Credentials you do need an account that is in the local Administrators group. With everything on a single server it can be a local account, but I'm using a domain account.
- Choose Activate feature in all existing site collections.
Preparing a Document Library
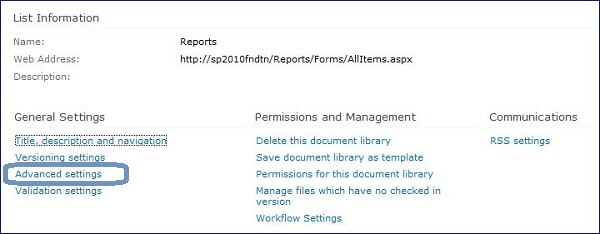
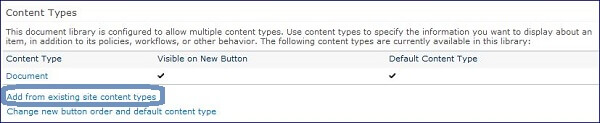
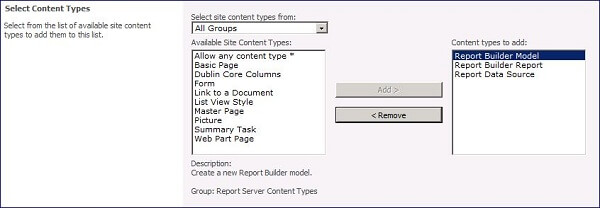
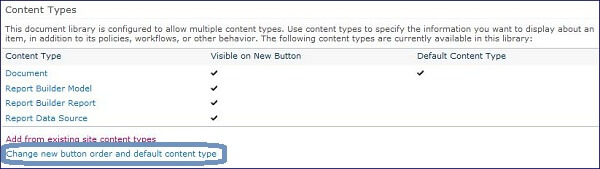
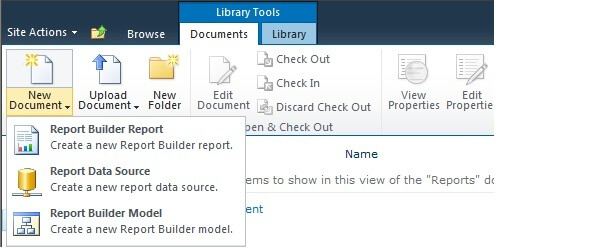
There is one last step that needs to be performed in order to create Reporting Services artifacts (e.g. shared data sources, report models, reports) in a SharePoint document library. We need to add the appropriate content types to the document library and customize the New Document menu options. For this example I created a brand new document library called Reports.
Navigate to the document library then click Library Settings as shown below:


Ref link: http://www.mssqltips.com/tip.asp?tip=2122
0 comments:
Post a Comment